Waterproofing Tub Shower Surround | A DIYer’s Guide
I. Introduction
Well, hello there my fellow bathroom renovators! Today we’re going to talk about one of the most important aspects of any shower renovation project: waterproofing those shower walls. Believe me, you don’t want to skip this step unless you enjoy expensive water damage and mold growth in your bathroom. Trust me, I’ve seen it all.
Now, I know some of you might be thinking “But waterproofing is so complicated and time-consuming!” Fear not, my friends, because with the right materials and techniques, waterproofing your shower walls can be a breeze.
So let’s dive in and explore the wonderful world of waterproofing. We’ll cover everything from the best materials and techniques to how to prevent mold and water damage. And if you’re looking for some great product recommendations, be sure to check out this awesome article on the best bathtub shower wall materials. Trust me, you won’t want to miss it.
II. Materials Needed
Alright, let’s talk about the materials you’ll need to waterproof your shower walls. First and foremost, you’ll need a good quality tile backer board. This is the substrate that your tiles will be installed on and is crucial for creating a strong and waterproof base for your shower walls. Some popular brands include HardieBacker, Durock, and Wedi.
Once you’ve got your backer board in place, it’s time to apply the waterproofing material. Liquid waterproofing membranes are a popular choice for their ease of application and effectiveness. RedGard and AquaDefense are two great options. Alternatively, you can use a waterproofing membrane sheet such as Schluter Kerdi or Laticrete Hydro Barrier.
Next up, you’ll need some water-resistant cement and tile adhesive for installing your tiles. And of course, you’ll need the tiles themselves. Choose a material and design that fits your style and bathroom aesthetic.
Finally, tools you’ll need to install all of this. A notched trowel, tile spacers, and a tile cutter or wet saw will come in handy. And if you’re feeling fancy, you can even invest in an uncoupling membrane to prevent any future cracking in your tiles.
Now, I know this may seem like a lot of materials, but trust me, it’s worth it to invest in high-quality materials for a long-lasting and waterproof shower.
So gather up your materials and let’s get ready to waterproof those shower walls like a pro!
III. Preparation
Now that you’ve got all of your materials, it’s time to start prepping your shower walls for waterproofing.
First things first, make sure your shower walls are clean and free of any debris. You want a smooth surface to work with for the best results. If you’re starting from scratch, install your tile backer board according to the manufacturer’s instructions.
Once your backer board is installed, it’s time to start waterproofing. Apply your liquid or sheet waterproofing membrane to the entire surface of the shower walls, including the seams and corners. Be sure to follow the manufacturer’s instructions for application and drying time.
While waiting for the waterproofing to dry, take this time to plan out the layout of your tiles. This will help ensure a clean and professional-looking finished product.
Before tiling, it’s important to make sure your walls are level and plumb. Use a level and straight edge to check for any areas that need to be adjusted.
Once your walls are prepped and ready to go, it’s time to start tiling. Apply a layer of water-resistant cement to the back of each tile and press it firmly onto the wall, using tile spacers to ensure even spacing. Continue tiling until the entire surface is covered.
After your tiles are installed, allow the cement to dry completely before grouting. This will ensure a strong and stable finished product.
And that’s it! With a little bit of preparation and some elbow grease, you’ll have a beautifully waterproofed shower that will last for years to come. For more detailed instructions on how to waterproof your shower walls, be sure to check out that article I mentioned earlier.
IV. Waterproofing Methods
Now that you’ve prepared the substrate, it’s time to get into the actual waterproofing methods. There are several methods for waterproofing shower walls, and which one you choose will depend on your preference, budget, and the specific needs of your project.
Liquid Membrane
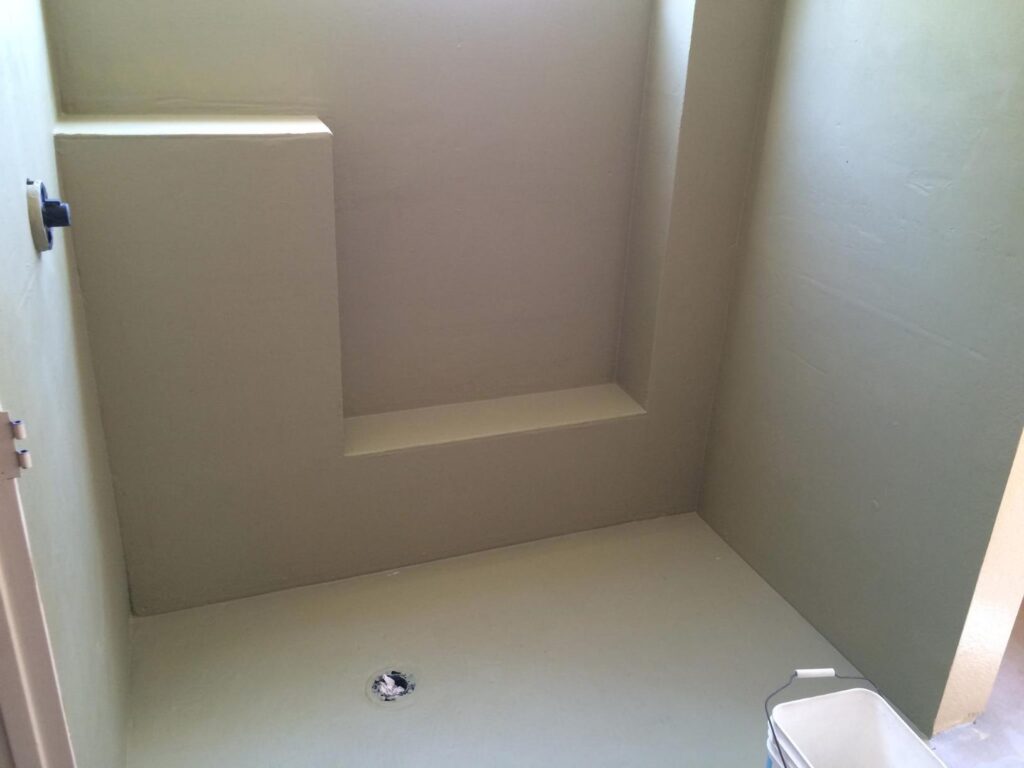
One of the most popular methods for waterproofing shower walls is by using a liquid membrane. This material is typically applied with a roller or brush directly onto the substrate, creating a seamless, waterproof layer. Liquid membranes are often made of water-resistant materials like acrylic, urethane, or rubber, and they’re great for creating a barrier that can withstand the constant moisture in a shower.
Sheet Membrane
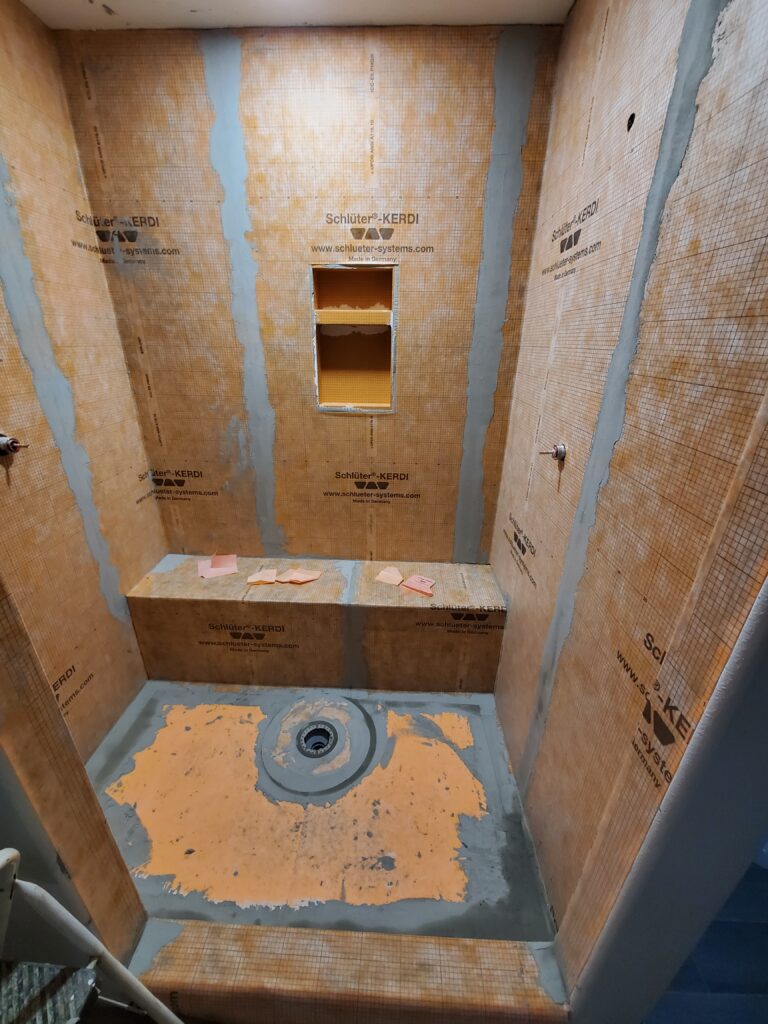
Another method for waterproofing shower walls is using a sheet membrane. This method involves applying large sheets of waterproofing material over the substrate before tiling. The membrane is usually made of materials like polyethylene, polypropylene, or PVC, and it can be easily cut and adjusted to fit any size or shape of the shower walls. Sheet membranes are a great option if you’re looking for a quick and easy waterproofing method.
Cement Board
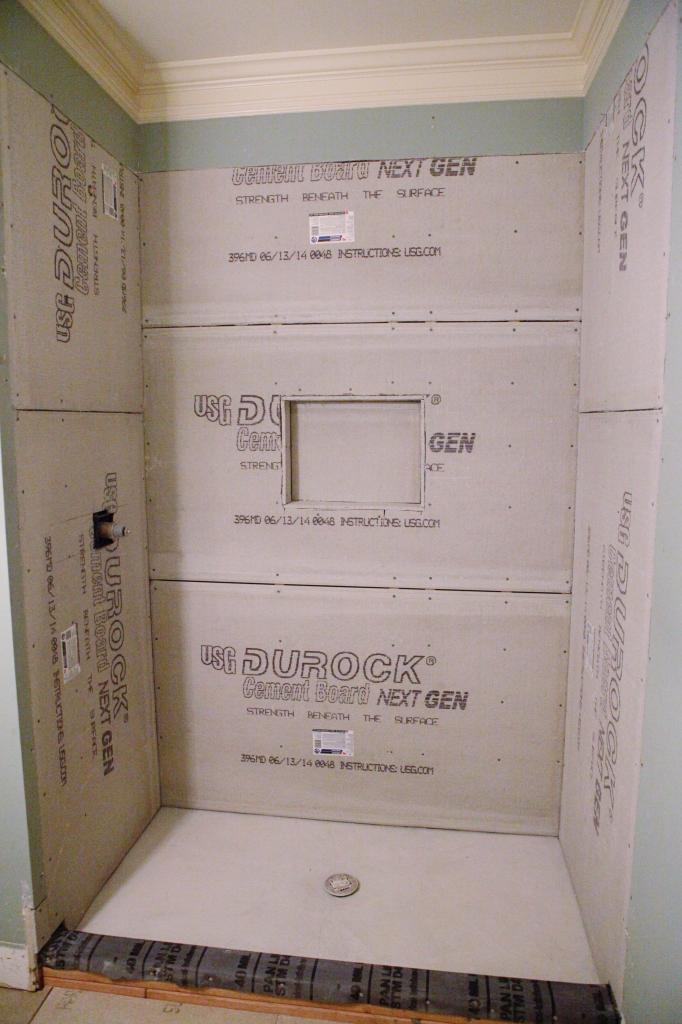
Using a cement board is another popular method for waterproofing shower walls. Cement boards are water-resistant and made of cement and glass fibers, making them strong and durable. They’re easy to install and can be cut to any size or shape, making them a great option for custom showers. Cement boards also provide a stable and flat surface for tiling, ensuring that your tiles will stay in place and look great for years to come.
Uncoupling Membrane
An uncoupling membrane is a type of sheet membrane that’s designed to uncouple or separate the tiles from the substrate. This method is great for preventing cracks and leaks in your shower walls. Uncoupling membranes are typically made of materials like polyethylene, polypropylene, or PVC, and they provide a layer of waterproofing between the tiles and the substrate.
No matter which method you choose, the most important thing is to ensure that your shower walls are properly waterproofed before tiling. This will help prevent water damage, mold growth, and other issues that can arise from constant exposure to moisture.
V. Tiling
Alright, now that we’ve got our substrate and waterproofing sorted, it’s time for the fun part – tiling!
Before we get started, it’s important to note that the type of tiles you choose will affect the installation process. Some tiles are easier to work with than others, and some may require additional preparation steps.
Assuming you’ve selected your tiles and are ready to go, here’s how to get started:
- Measure and mark: Measure the area you’ll be tiling and mark it out using a straightedge and a pencil. This will help ensure that your tiles are installed in a straight and even pattern.
- Cut tiles to size: Use a tile cutter or wet saw to cut your tiles to the appropriate size. Make sure to wear safety glasses and follow the manufacturer’s instructions for the cutting tool.
- Apply adhesive: Using a notched trowel, apply a layer of tile adhesive to the backer board. Make sure to work in small sections to prevent the adhesive from drying out.
- Lay tiles: Starting at the bottom of the wall, press each tile firmly into the adhesive, using spacers to maintain even spacing between tiles. Make sure to check the level frequently to ensure that the tiles are installed evenly.
- Cut around fixtures: Use a tile nipper or wet saw to cut tiles to fit around fixtures such as showerheads and faucets.
- Let dry: Allow the adhesive to dry completely before grouting the tiles.
- Grout: Using a rubber float, apply grout to the gaps between tiles, working in small sections. Once the grout has been applied, use a damp sponge to wipe away any excess.
- Seal: Once the grout has dried, apply a sealer to the tiles to prevent moisture from seeping through the grout and damaging the backer board.
And there you have it – easy as pie! With the right materials and a little bit of know-how, tiling your shower walls can be a fun and rewarding DIY project.

VI. Conclusion
Well folks, that’s it for our guide on how to install tile backer board and waterproof your shower walls! As you can see, it’s not the most exciting topic, but it’s definitely an important one if you want to avoid costly water damage and mold issues in your bathroom.
By following these steps and using the right materials, you can ensure that your shower walls are properly waterproofed and ready for tiling. Don’t forget to take the time to properly prepare your substrate and apply the waterproofing membrane before tiling, as this is a crucial step that will save you headaches down the road.
Remember, while this may seem like a daunting task at first, with the right tools and a bit of patience, anyone can install tile backer board and waterproof their shower walls.
If you have any other questions or need further guidance, don’t hesitate to reach out to a professional or do some additional research online. And as always, happy tiling!